

What Is a Weldment Profile in SOLIDWORKS?
A weldment profile is a predefined 2D sketch saved as a Library Feature Part (.SLDLFP). It is applied along sketch paths using the Structural Member tool to generate welded structures quickly and accurately.
Default File Location for Weldment Profiles
SOLIDWORKS stores weldment profiles in a predefined system directory.
How to Find the Weldment Profile Location
Go to Tools → Options
Select System Options
Choose File Locations
From the drop-down, select Weldment Profiles

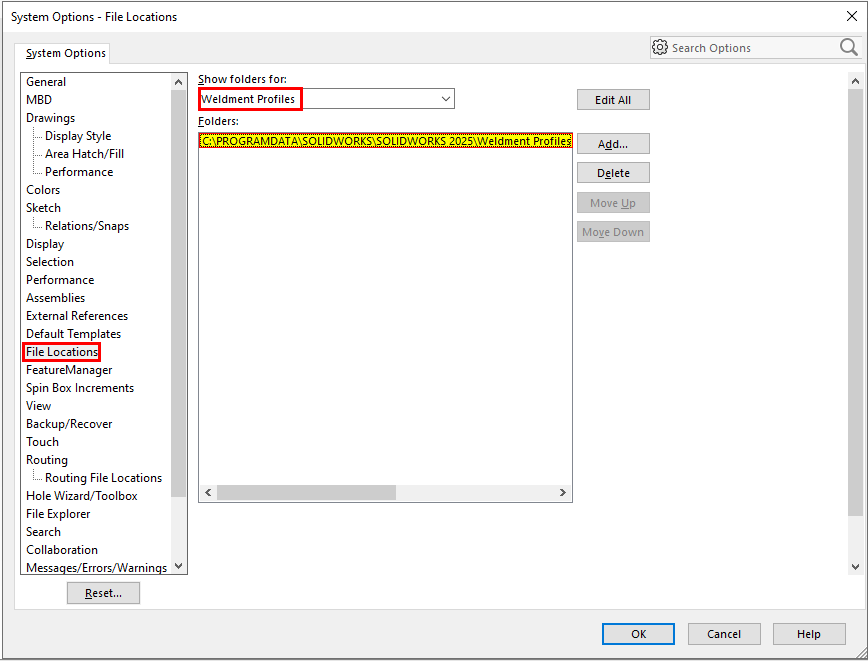
Default Path (Example)
C:\ProgramData\SOLIDWORKS\SOLIDWORKS 2025\Weldment Profiles
You can:
Store your custom weldment profiles in this default folder, or
Maintain a separate custom folder and add its path in System Options → File Locations
Either method will make the profiles available in the Structural Member feature.
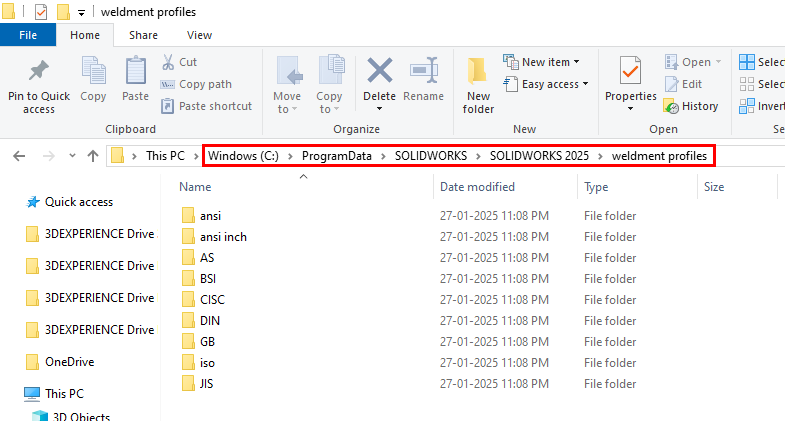
Weldment Profile Folder Structure Explained
SOLIDWORKS recognizes two common weldment profile structures:
1. Single SLDLFP with Multiple Sizes
One
.SLDLFPfileMultiple configurations, each representing a different size
2. One SLDLFP per Size
Each
.SLDLFPfile represents only one profile sizeEasier to manage for non-standard or custom shapes
Recommended for custom profiles: One file per size for clarity and control.
How to Create a Custom Weldment Profile in SOLIDWORKS
Step 1: Design the Custom Shape
Open a new Part file
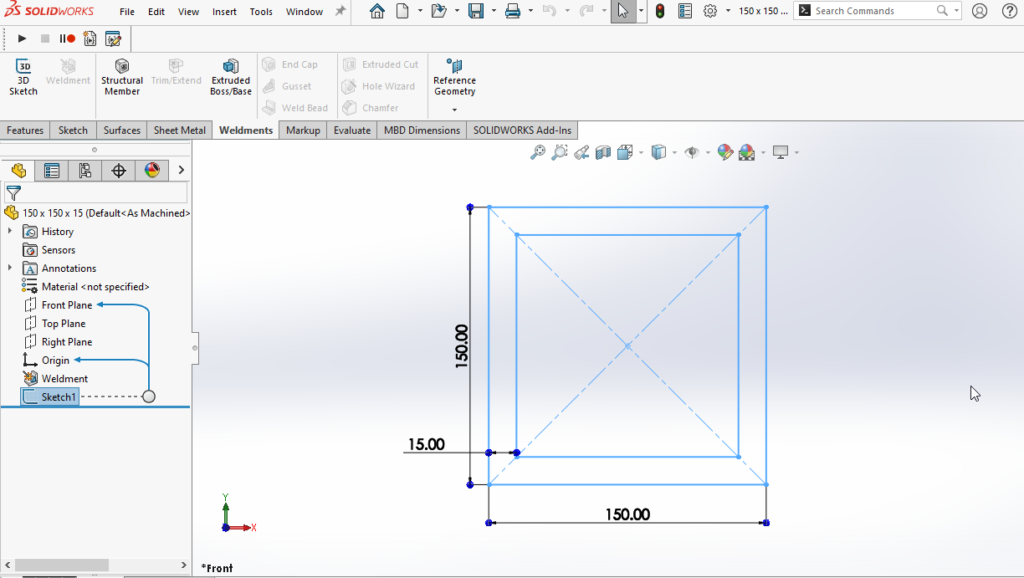
Create a 2D sketch on any default plane
Fully define the sketch
Ensure the sketch represents the cross-section of the weldment
Tip: Place the sketch origin logically, as it controls profile alignment.
Step 2: Save as Library Feature Part (.SLDLFP)
Weldment profiles must be saved as Library Feature Parts, not standard part files.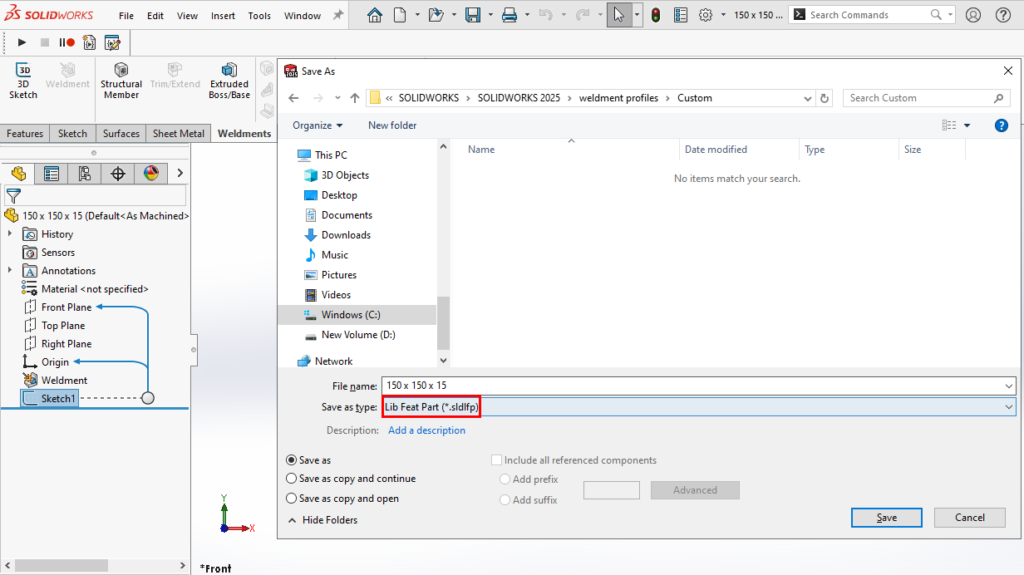
Steps:
Select the sketch in the FeatureManager
Go to File → Save As
Choose Library Feature Part (*.sldlfp)
Select your weldment profile folder
When prompted, click No (do not convert to a feature)

Important: Selecting the sketch before saving ensures it is recognized as the profile reference.
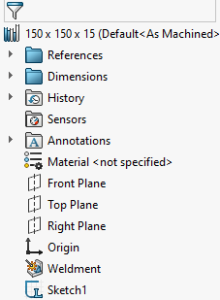
After saving:
The part icon changes to a Library Feature bookmark
The profile becomes available in the Structural Member tool
Using the Custom Weldment Profile
Activate Weldments
Open Structural Member
Select:
Standard (folder name)
Type (subfolder)
Profile (your custom
.SLDLFP)
Apply it to sketch segments
Your custom profile now behaves like any standard SOLIDWORKS weldment profile.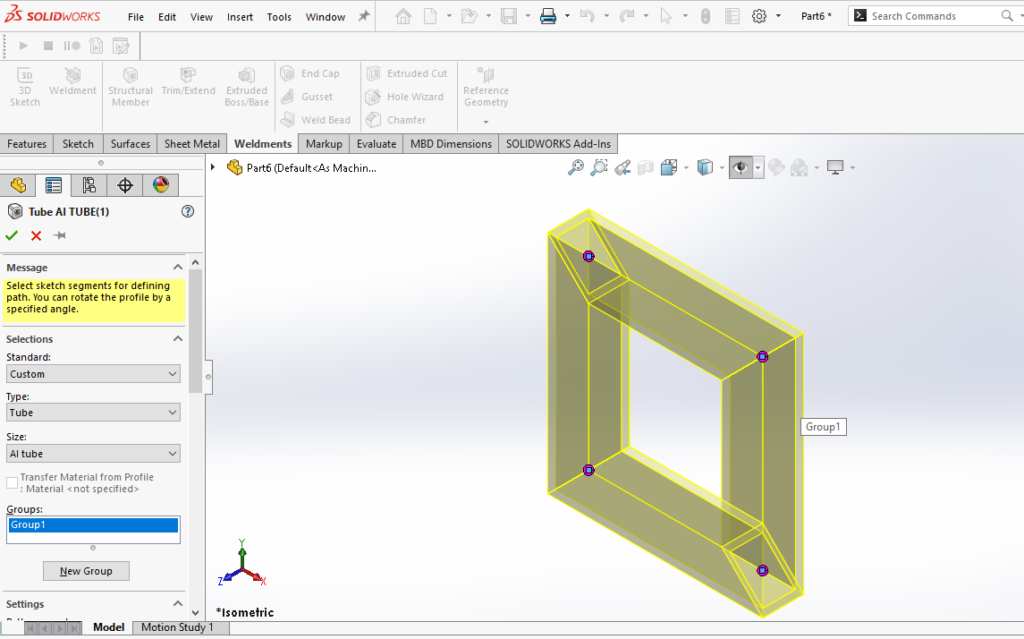
Best Practices for Custom Weldment Profiles
Use clear folder naming conventions
Keep profiles fully defined
Avoid unnecessary sketches or features
Maintain separate folders for company standards
Back up custom profile libraries regularly
Conclusion
Customizing non-standard weldment profiles in SOLIDWORKS allows you to model real-world fabricated structures with precision. By understanding the correct file location, folder structure, and Library Feature workflow, you can efficiently create reusable profiles and streamline your weldment design process.
Author Profile

An Elite Application Engineer, with a strong emphasis on cultivating long-term relationships and driving customer success. And, plays a pivotal role in ensuring clients derive maximum value from their SOLIDWORKS solutions, specializing in personalized support during PDM implementation projects, combines years of industry experience to provide expert guidance. Recognized as a go-to expert in technical support and customer success, focuses on helping clients optimize their use of SOLIDWORKS CAD, SOLIDWORKS PDM (Product Data Management), and the robust 3DEXPERIENCE platform, enabling businesses to streamline their processes and enhance their product development workflows.