


Step 1: Login to 3DEXPERIENCE Platform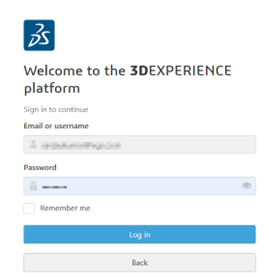
Step 2: Click Compass > Me > 3DEXPERIENCE SOLIDWORKS > SOLIDWORKS Design > Install Now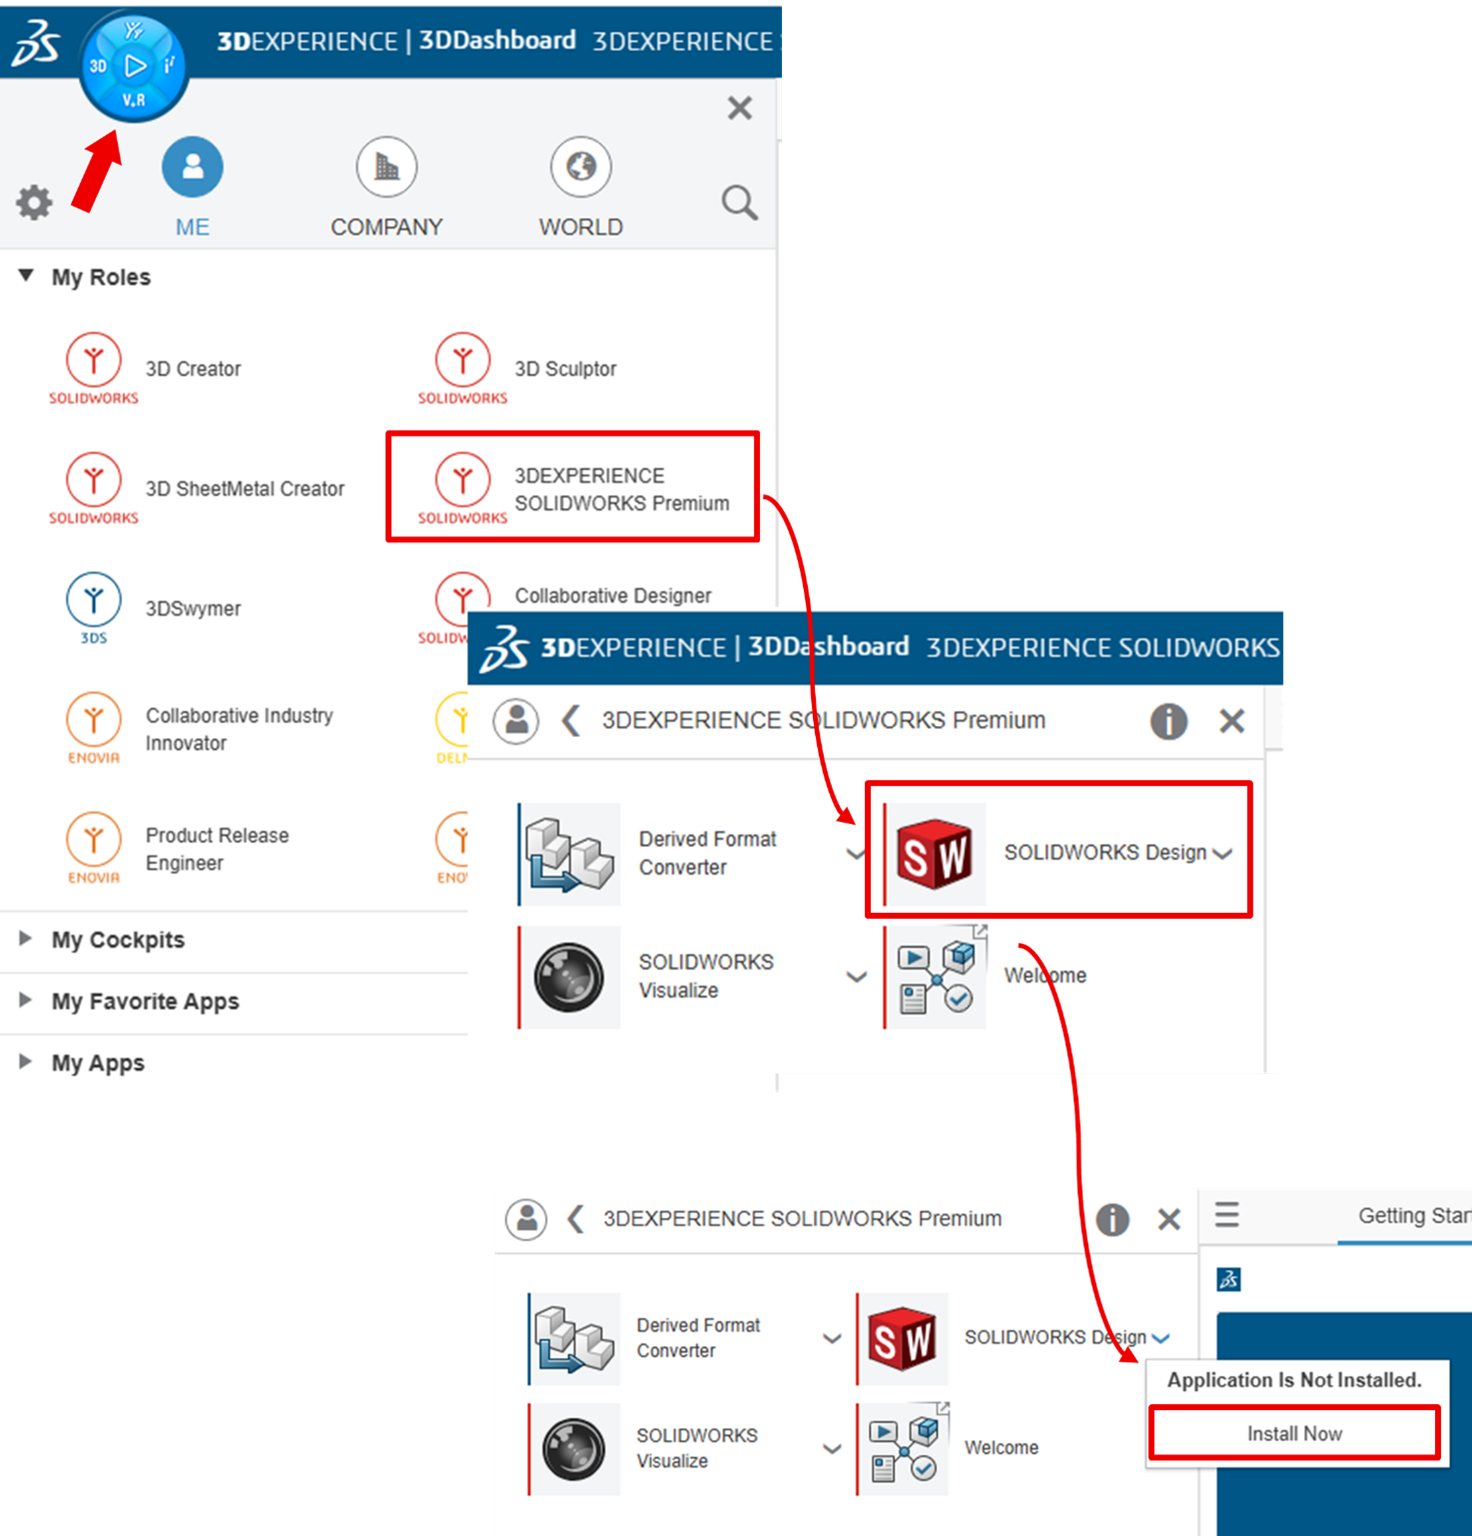
Step 3: In the Welcome to 3DEXPERIENCE Launcher dialog, click Download 3DEXPERIENCE Launcher.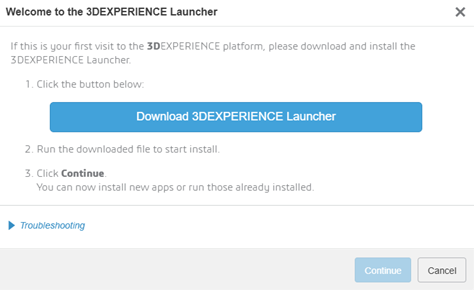
Step 4: Locate the downloaded file 3DEXPERIENCELauncher and double-click to install.
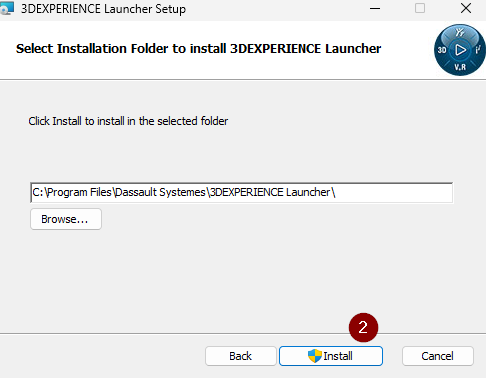
Step 5: Follow the prompts to complete the installation. We recommend that to use the file locations as default (C:\Program Files\Dassault Systemes\3DEXPERIENCE Launcher).
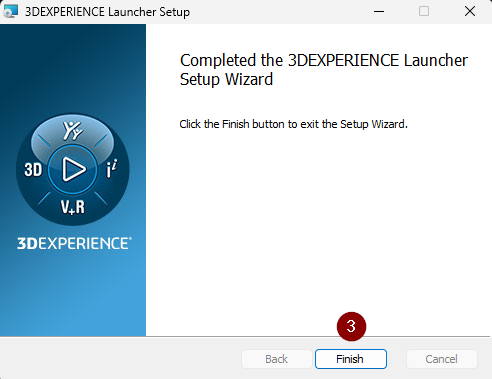
Step 6: Click ‘Finish’ to close the 3DEXPERIENCE Launcher Setup.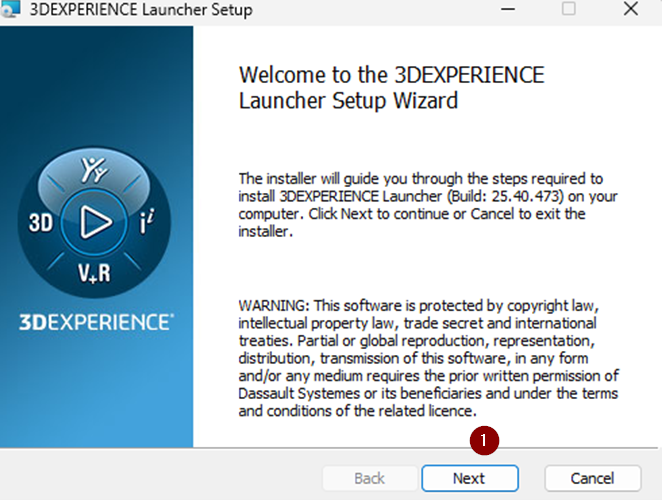
Step 7: In the 3DEXPERIENCE Platform, click ‘Continue’ to proceed with installing SOLIDWORKS Connected.
Step 8: In the 3DEXPERIENCE Installation web dialog, choose which roles to install:
Step 9: Install All Granted Roles install all roles granted to the user, e.g., SOLIDWORKS Connected, SOLIDWORKS Visualize Connected, etc.
Step 10 : Install All Roles Containing SOLIDWORKS Design only installs the roles which contain SOLIDWORKS Connected.
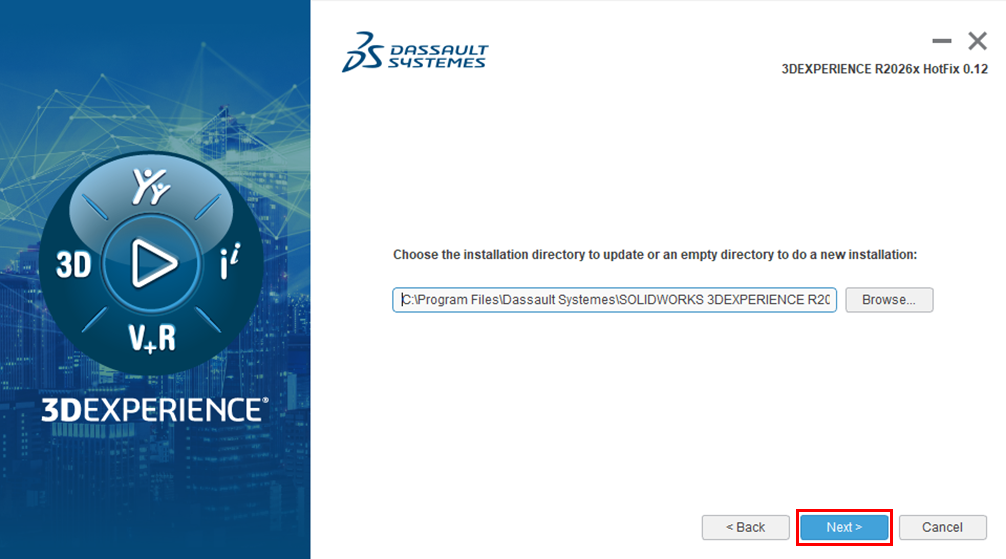
Step 11: Clicking Next to proceed with the installation. We recommend that to use the file locations as default.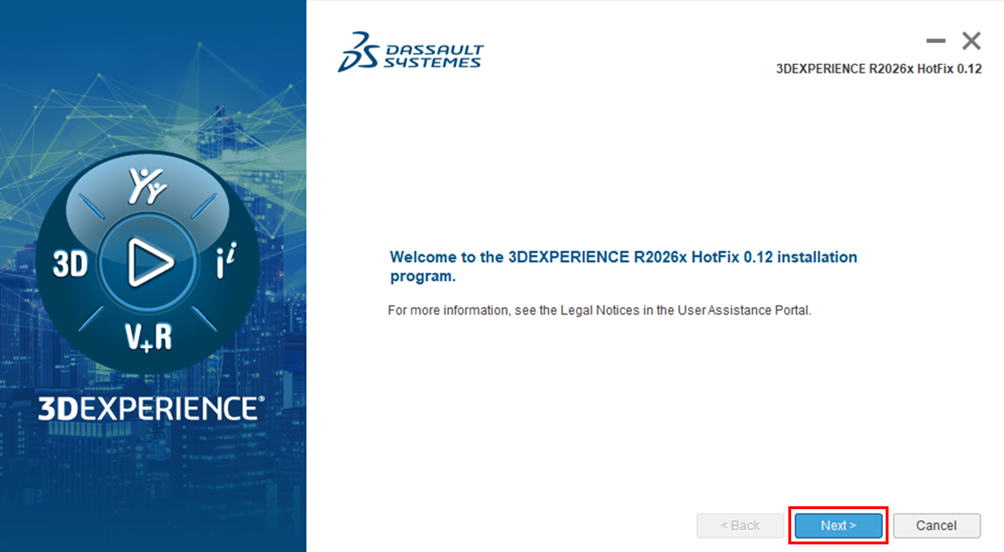
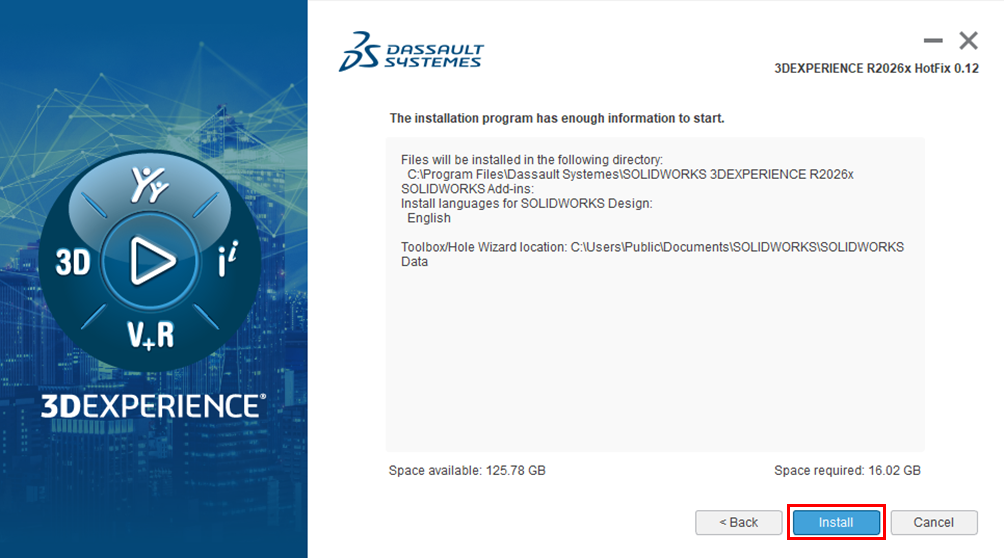
Step 12: Once the installation program has finished on your computer, click Close.

*** Thank you***

