Introduction
As mentioned earlier, this Series of Blogs provides recommendations for both CAD Administrators and drafters related to organizing and managing the CAD Environment, Tools and Techniques for maximizing efficiency when working with SOLIDWORKS drawings.
Because drawings link parametrically to 3D models, the drawing performance depends greatly on the optimization of those models. Many of the slowdowns that drafters reported are related to the models, system settings or document properties.
When developing a new product, self-taught SOLIDWORKS users who have not optimized their drafting environment estimate that they dedicate 50% of their time to creating part and assembly models and the other 50% of their time detailing those models in drawings.
Users with full training who have optimized the drafting environment can take full advantage of the parametric and associative nature of SOLIDWORKS. This enables them to use less than 10% of their time working on drawings.
The goal of this Blog Series is to help users to unlock the 40% gap in productivity.
Stage 2 – Efficient Dimensioning:
One of the most time-consuming activities when detailing drawings is applying dimensions. Using the same “Single Source of Truth” principle described in previous post “Benefits of using Custom Properties in SOLIDWORKS Drawings“, the most efficient drafters avoid duplicating work by taking advantage of the dimensions in the model.
It is true that the dimensions used to define sketches and features in the model might not always be relevant for detailing the manufacturing operations in the model, especially when the modelling technique does not follow the manufacturing process. With that understanding, you can add the Reference and DimXpert dimensions to the model and assign them to Annotation views for importation into the drawing views.
The other major benefit of using such techniques is an increase of efficiency at the team level. Senior designers can add all the dimensions required for detailing and include them in Annotation views or 3D views. This helps ensure that a junior member of the team can use them to quickly create accurate drawings that contain all required dimensions and tolerances.
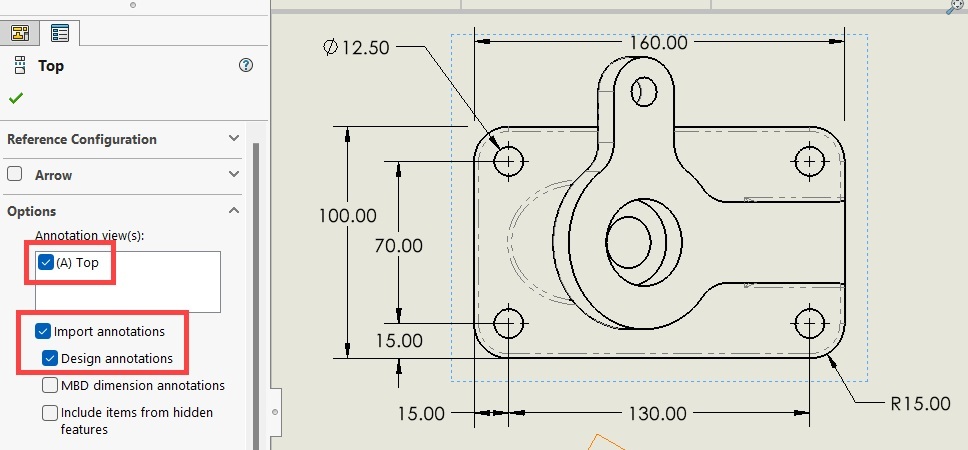
- Annotation Views
Annotation views are useful to collect relevant product and manufacturing information (PMI). PMI includes entities like the dimensions and annotations in a model (part or assembly), and assigns them to a specific orientation.

- Creating Annotation views
SOLIDWORKS creates some annotation views automatically, when a user adds dimensions or annotations parallel to a standard drawing view. A user can add others manually and the user can add, remove or move dimensions between existing annotation views.
As a starting point in learning more about using annotation views, you can view the self-paced Annotation Views video training lesson on my.solidworks.com.
After defining annotation views in the model, you can use the views to automatically populate the drawing views with PMI.
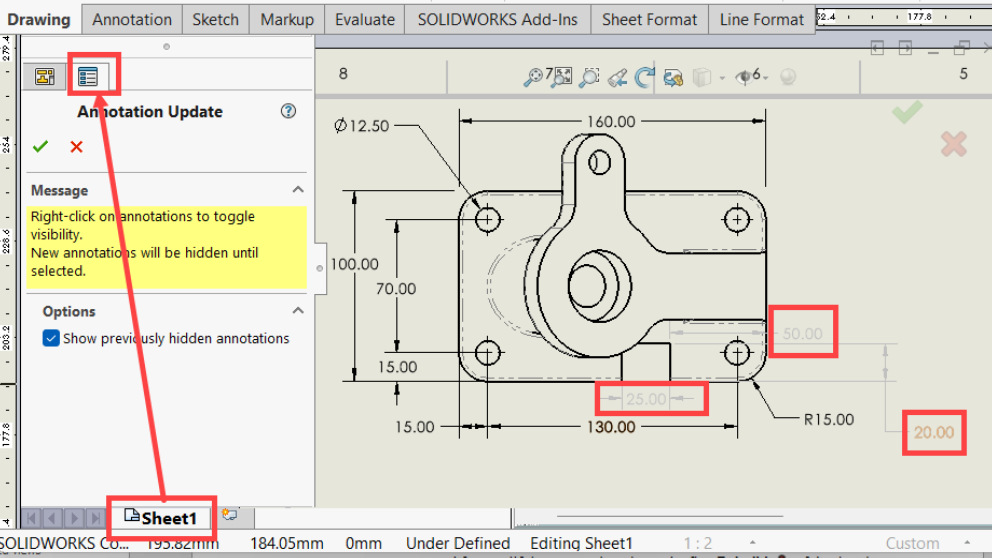
ii. Updating the PMI on drawings after revising Annotation views
When adding, editing or removing dimensions and annotations from the model annotation views, it is easy to update the corresponding drawing views.
After modifying the annotation views, the first perform a Rebuild of the drawing or Refresh of the view palette runs the Annotation Update command. While this command is active, previously hidden annotations and modified annotations appear as gray in the existing drawing views. Right-click the annotations to display them.
Be aware that you can access hidden dimensions anytime using the Hide/Show Annotations command.
Another way to run the Annotation Update command is by following the two steps:
- Click the Sheet tab.
- Click the Property Manager tab.
- 3D Views
3D views are the best tools to capture multiple settings such as the following and save them under one name:
- Orientation
- Annotation views
- Configuration
- Display State
To create 3D views, you must have a license for the SOLIDWORKS MBD application. Be aware that at this time, SOLIDWORKS MBD is not available to users of 3DEXPERIENCE SOLIDWORKS.
After creating a 3D view, the view is accessible to all SOLIDWORKS users, regardless of the type of license.
You can learn more about 3D views on my.solidworks.com.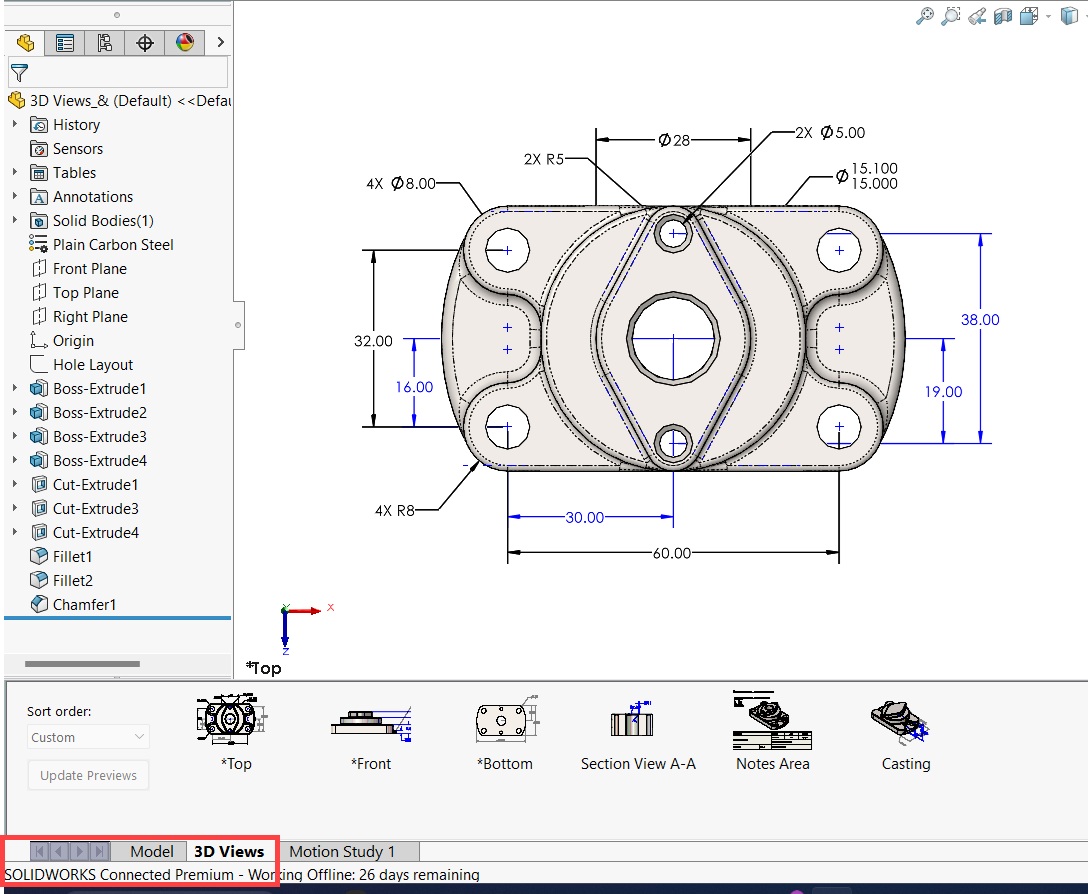
You can insert 3D views in 2D drawings as drawing views by dragging the views from the View Palette to the drawing sheet.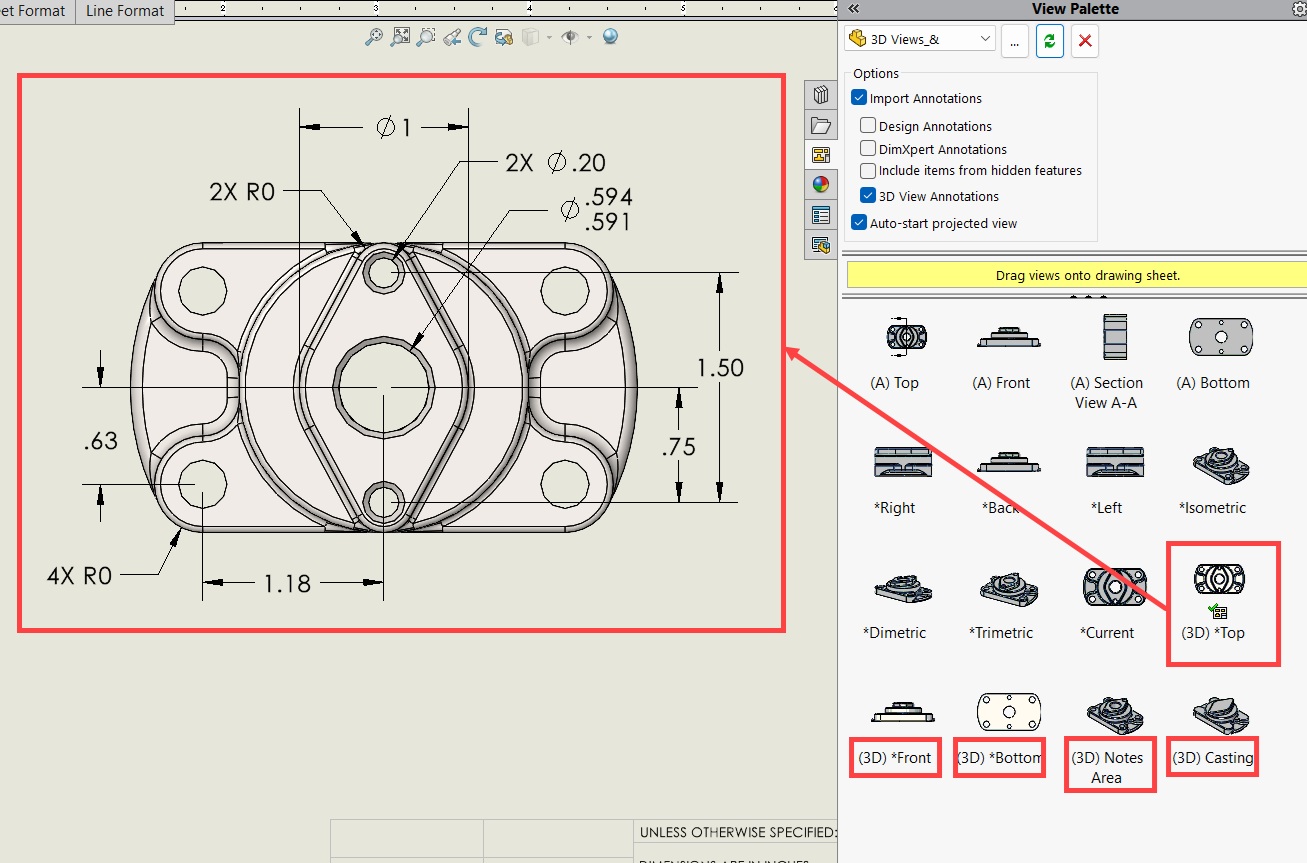
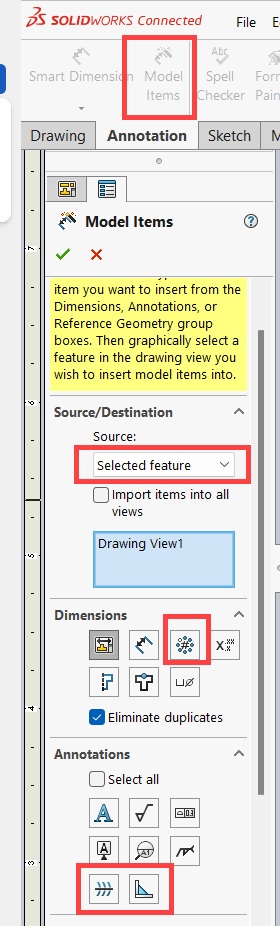
c. Model Items
You can use the Model Items command to perform further customizations when inserting model dimensions and annotations in the drawing views. For maximum efficiency, consider using Annotation views first and Model Items second. The Model Items functionality includes:
- Adding dimensions for selected features
- Adding annotations that annotation views do not recognize, such as:
- Pattern instance counts
- Caterpillar
- End treatments
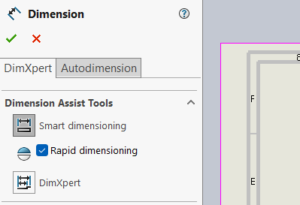
d. Smart DimensionsEfficient drafters use Smart Dimensions only for adding the remaining dimensions that are not easy to capture as model items.
e. Efficiency and Consistency Enhancing Tools for DimensioningWhen customizing dimensions, speed and consistency are critical. Consider the following tools:
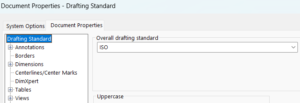
i.Drafting standards
Drafting standards are the best tools to ensure consistency of the default settings for your team. The standards are easy to customize and you can save them in external files and apply them quickly to modify existing drawings.
ii.stylesStyles make it possible to capture all settings of an entity, such as dimensions or annotations for:
- Reuse in the same drawing
- Save in external files to:
- Share with team members
- Load and apply on other drawings
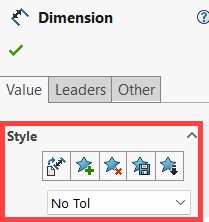
Ideally, it is best to use styles when dimensions or annotations deviate from the drafting standard.
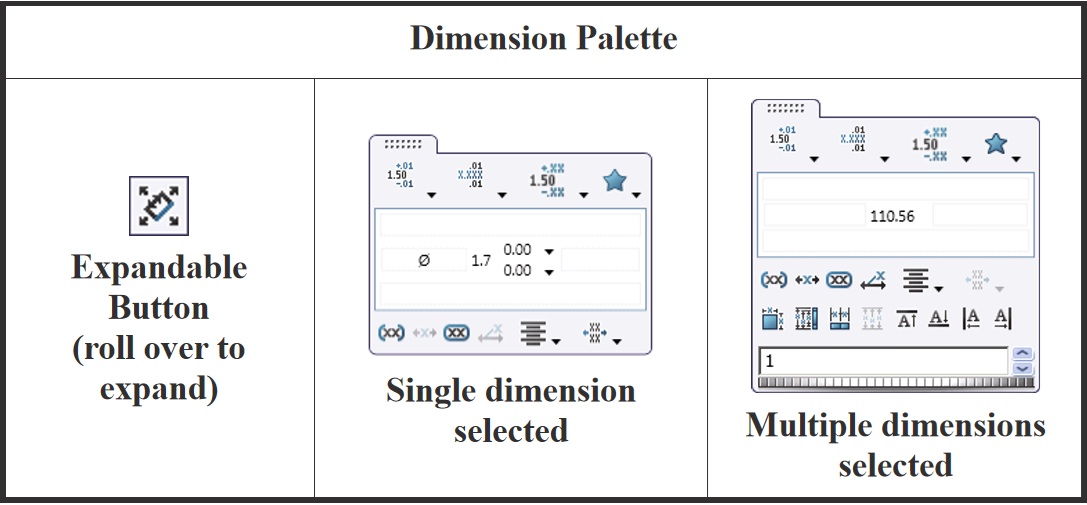
iii. Dimension Palette
The Dimension Palette is a productivity enhancer that you can incorporate in the “Stay in the Flow” modeling workflow.
Simply select one or more dimensions and an expandable button appears next to the cursor. It provides shortcuts to some of the most commonly used dimension properties as well as additional settings for arranging and aligning dimensions.
Thanks for reading!!
Stay tuned for Stage 3 of “How to perform effective Drafting using SOLIDWORKS”!!!
———————————————————————————————————-