

How to perform effective Drafting using SOLIDWORKS in 10 Stages- Stage 3
As mentioned earlier, this Series of Blogs provides recommendations for both CAD Administrators and drafters related to organizing and managing the CAD Environment, Tools and Techniques for maximizing efficiency when working with SOLIDWORKS drawings.
The goal of this Blog Series is to help users to unlock the 40% gap in productivity.
As the blog progress, we will be learning more on the the various areas and factors that affects the efficiency of the Detailing process. As a part of that, in this blog we will see how and why the difference opening modes affects the overall performance of Designer and how we can able to utilize to it’s max.
Stage 3 - Drawing Opening Modes:
When users complain that a certain drawing is large or slow, they usually refer to these three major symptoms:
- Long opening time
- Lag when performing various tasks after the opening a drawing
- Long saving times
For existing drawings, you can greatly mitigate such symptoms by asking a critical question:
Why do I need to open this drawing?
The answer to this question allows you to match any task with the most efficient mode of opening a drawing.
There is a simple fact that explains the recommendations in the above Table; “A drawing opens faster if the minimal amount of data is loaded in the RAM.”
Most users open drawings by double-clicking the file name in Windows File Explorer or from the SOLIDWORKS PDM add-in. That action causes a drawing to open in either
Lightweight mode or Resolved mode, depending on the system options. Both of the modes require that the assembly first opens in the RAM.
As shown in the below image, opening the assembly starts multiple computation phases. All of these phases are time consuming.
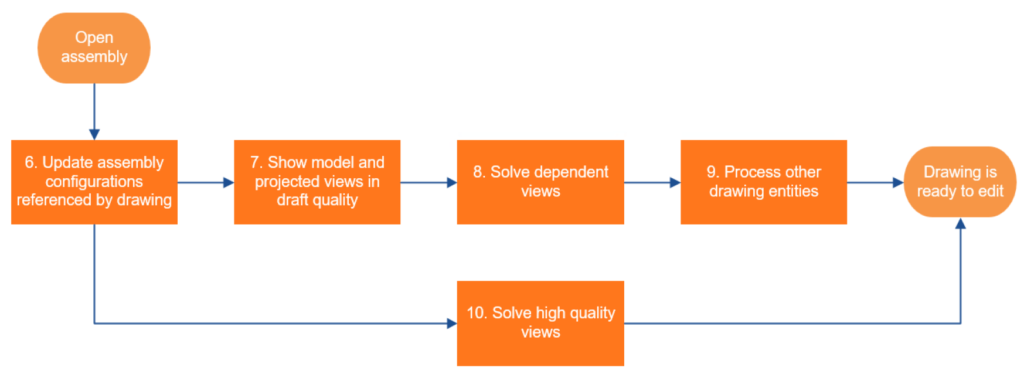
For most tasks in the Table, the information required already exists in the drawing. For example, if the drawing is in a released state, opening its assembly is even counterproductive because it can potentially trigger an update of the drawing views.
The following sections examine each of the opening modes.
- Detailing Mode
If the Save model data option is active in the Document Properties >Performance options, more information saves in the drawing file for each drawing entity. This allows the drawing to open for detailing operations without loading the model into RAM.
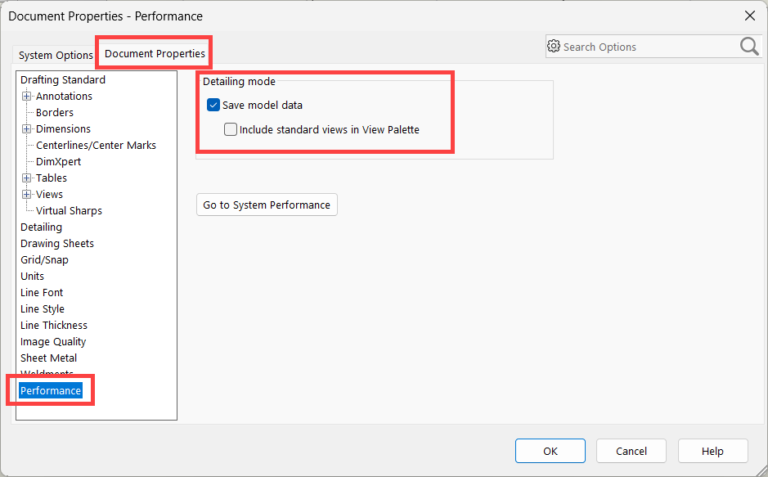
The only file that is required for working in this mode is the drawing file. This opens interesting opportunities for collaboration with third-party associates.
- Functionality
When a drawing opens in Detailing mode, the operational speed is optimal. There is no lag when switching sheets, zooming in or out or when panning or selecting entities.
An impressive number of tools are available to:
- Edit file properties
- Edit document properties including the drafting standard
- Add, edit or delete layers
- Add, move or delete sheets
- Edit sheet properties including the sheet format
- Add standard views from the View Palette (if they were saved in the drawing file)
- Add detail views of existing views
- Break or crop existing views
Add empty views
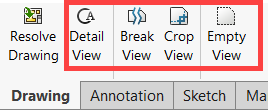
- Provide access to most detailing tools. As the software evolves, more tools become available. It is a recommendation to review the tools that become available with each new release

- Add Hole tables and Revision tables
- Add, edit or delete markups
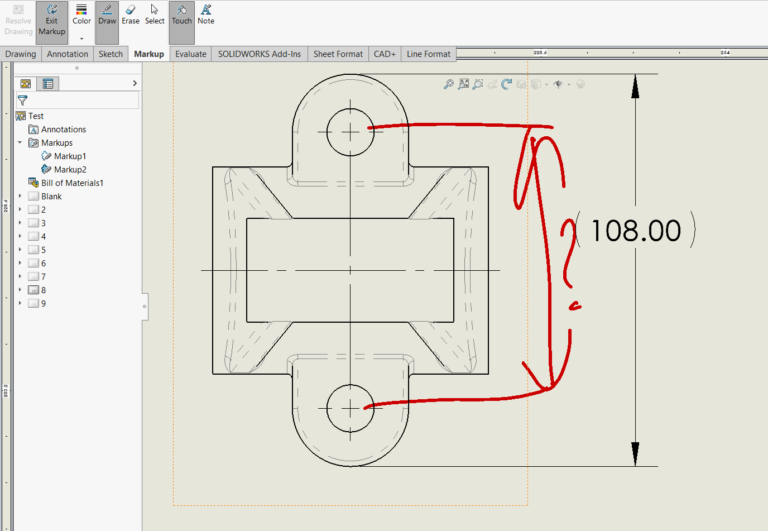
- Use the Design Checker to ensure that a drawing complies with the company standards.
2. Example of a collaboration scenario using the Detailing mode
Imagine that a company contracts the detailing of its drawings to a third-party provider. They follow this process:
- An employee of the company creates a new drawing that contains only the model, BOM and the projected and section views required to start the drafting process. The drawing contains no additional dimensions or notes.
- The employee shares the drawing with a contractor.
- The contractor opens the drawing in Detailing mode and adds:
- Detail views
- Break views
- Crop views
- Dimensions
- Notes
- Balloons
- The contractor sends the completed drawing back to the company employee.
- The company employee opens the drawing in Resolved mode and then rebuilds and saves the model.
- The job is complete.
Advantages:
- The company transfers a minimal amount of data, limiting the exposure of sensitive intellectual property to the third-party provider.
- Minimizes the time required for the contractor to open, edit and save files.
- Use cases
There are multiple use cases for opening a drawing in Detailing mode. To perform them, you can use the following techniques:
- Switch sheets: Select the sheet tabs at the bottom of the SOLIDWORKS window. Because the amount of data that loads in RAM is minimal and there is nothing to compute, the shift from one sheet to the next happens immediately.
- Zoom and pan inside a sheet: Viewport manipulations are very fast (more than 60 frames per second). There is no lag in operation.
- Print: If the drawing is in an approved state (read-only), opening it in Detailing mode is the best way to ensure that what prints corresponds to what was approved.
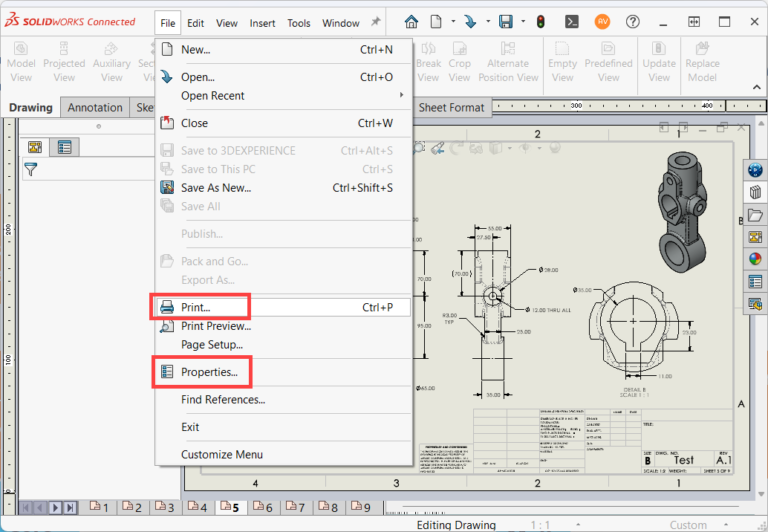
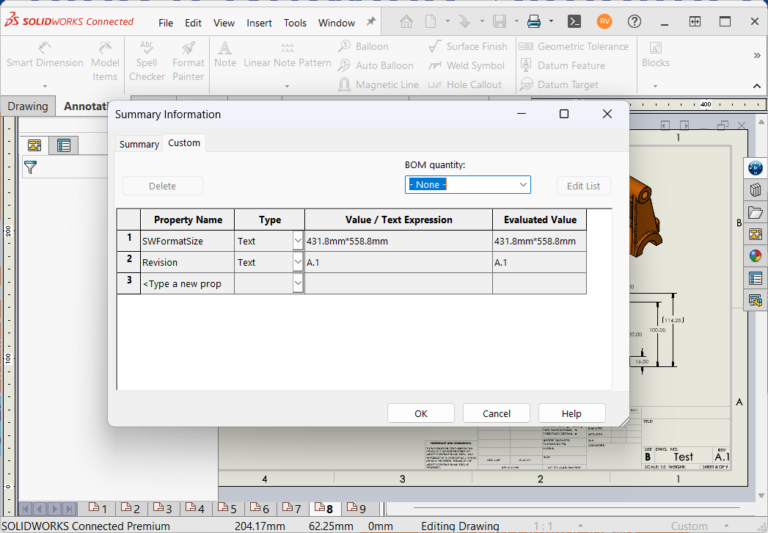
- Read and edit file properties: Only the properties of the current file are accessible in this mode. You cannot access the properties of the referred models because the model does not load.
Thanks for reading!!
Stay tuned for Stage 4of “How to perform effective Drafting using SOLIDWORKS”!!!

Authur
Palaniyappan T
An Elite Engineer & Certified SOLIDWORKS Expertwith a background in Mechanical Engineering, specializing in SOLIDWORKS Customer Success. He serves as Assistant Manager – Technical and also a Customer Success AE, leveraging almost 10 years of experience with SOLIDWORKS CAD, SOLIDWORKS PDM and also with the 3DEXPERIENCE Design Ecosystem. His expertise has enabled him to successfully assist over 160+ customers in resolving technical challenges, improving their design workflows, and achieving their goals.